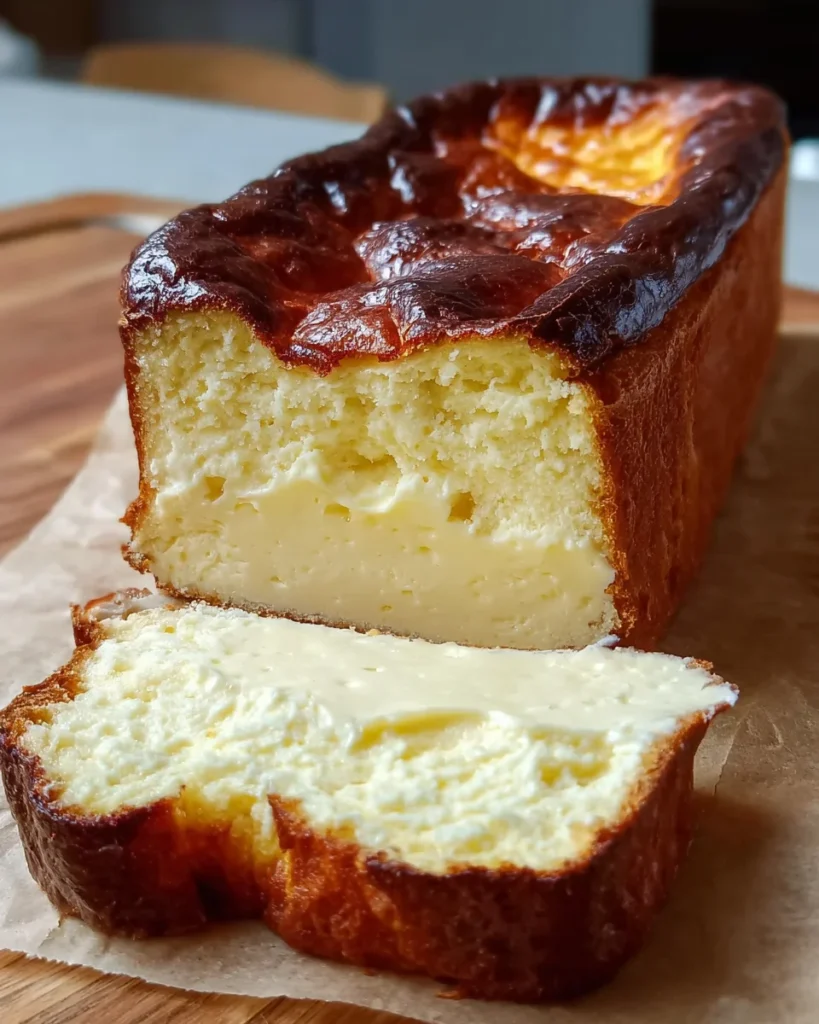
Introduction to Burnt Basque Cheesecake Loaf
As a home cook who thrives on whipping up delightful treats, I recently encountered a game-changer: the Burnt Basque Cheesecake Loaf. Imagine a dessert that’s not only visually stunning but also incredibly rich and creamy! Life is busy, and more often than not, we find ourselves in need of a quick solution for dessert that can impress family and friends alike. With this loaf, you’ll bring a slice of Spanish indulgence right to your kitchen. Trust me, this cheesecake loaf is destined to become a beloved favorite—even with the pickiest of eaters!
Why You’ll Love This Burnt Basque Cheesecake Loaf
This Burnt Basque Cheesecake Loaf is the perfect blend of simplicity and decadence. It comes together quickly, requiring just one bowl and minimal effort, which is a blessing for busy moms like us! The rich flavor and velvety texture will have your taste buds dancing. Plus, its stunning golden top makes it a show-stopper at any gathering. You’ll find yourself wanting to make it time and again!
Ingredients for Burnt Basque Cheesecake Loaf
Gathering the right ingredients is where the magic begins! Here’s what you’ll need to create your luscious Burnt Basque Cheesecake Loaf.
- Cream cheese: This is the star of the show! Choose full-fat for that creamy indulgence we crave.
- Granulated sugar: It brings sweetness to offset the cheesecake’s richness. You can even use alternatives like coconut sugar.
- Large eggs: These bind the ingredients and provide that desired fluffiness. Room temperature eggs work best for smooth mixing.
- Heavy cream: This adds lusciousness and a silky mouthfeel, making your cheesecake feel like a cloud of bliss.
- Vanilla extract: A splash of this aromatic essence enriches the flavor, taking your dessert to the next level.
- Salt: Just a pinch acts like a flavor enhancer, bringing out the best in your cheesecake.
- All-purpose flour: It lends structure to the loaf while keeping it light. If you’re gluten-free, consider using an alternative like almond flour.
For exact quantities, including some handy tips on ingredient sourcing, check the bottom of this article where you can print the recipe!
How to Make Burnt Basque Cheesecake Loaf
Creating this Burnt Basque Cheesecake Loaf is as easy as pie! Follow my step-by-step guide, and you’ll have a scrumptious dessert that will impress everyone. Just remember to take it slow and savor the process!
Step 1: Preheat the Oven and Prepare the Pan
First things first, preheat your oven to 200°C. This is key to achieving that characteristic burnished top we adore. While the oven warms up, grab your loaf pan. Line it with parchment paper, allowing some overhang. This makes it a breeze to lift out the loaf later! Trust me, this prep step pays off big time.
Step 2: Mix Cream Cheese and Sugar

Next, in a large mixing bowl, beat the softened cream cheese and granulated sugar together. Aim for a smooth and fluffy consistency. I like to use an electric mixer for this—it’s quick and easy! Scrape down the sides to ensure there are no lumps. We want a silky base for our cheesecake!
Step 3: Add Eggs One at a Time
One by one, add the large eggs into the mix. Make sure to mix thoroughly after each addition. This is crucial for a light texture! If you rush this step, your cheesecake may end up dense, and nobody wants that. Be patient, and enjoy the process!
Step 4: Incorporate Cream, Vanilla, and Salt
Now, it’s time for the heavy cream, vanilla extract, and a pinch of salt. Pour them into your bowl, and mix until fully combined. The mixture should become smooth and glossy, resembling a dreamy cloud of deliciousness. This combination elevates the flavors beautifully!
Step 5: Add Flour
Gently sift in the all-purpose flour. Be careful not to overmix! Fold the flour into the batter until just combined. Overworking can lead to a dry texture, which we definitely want to avoid. So, keep it gentle!
Step 6: Bake
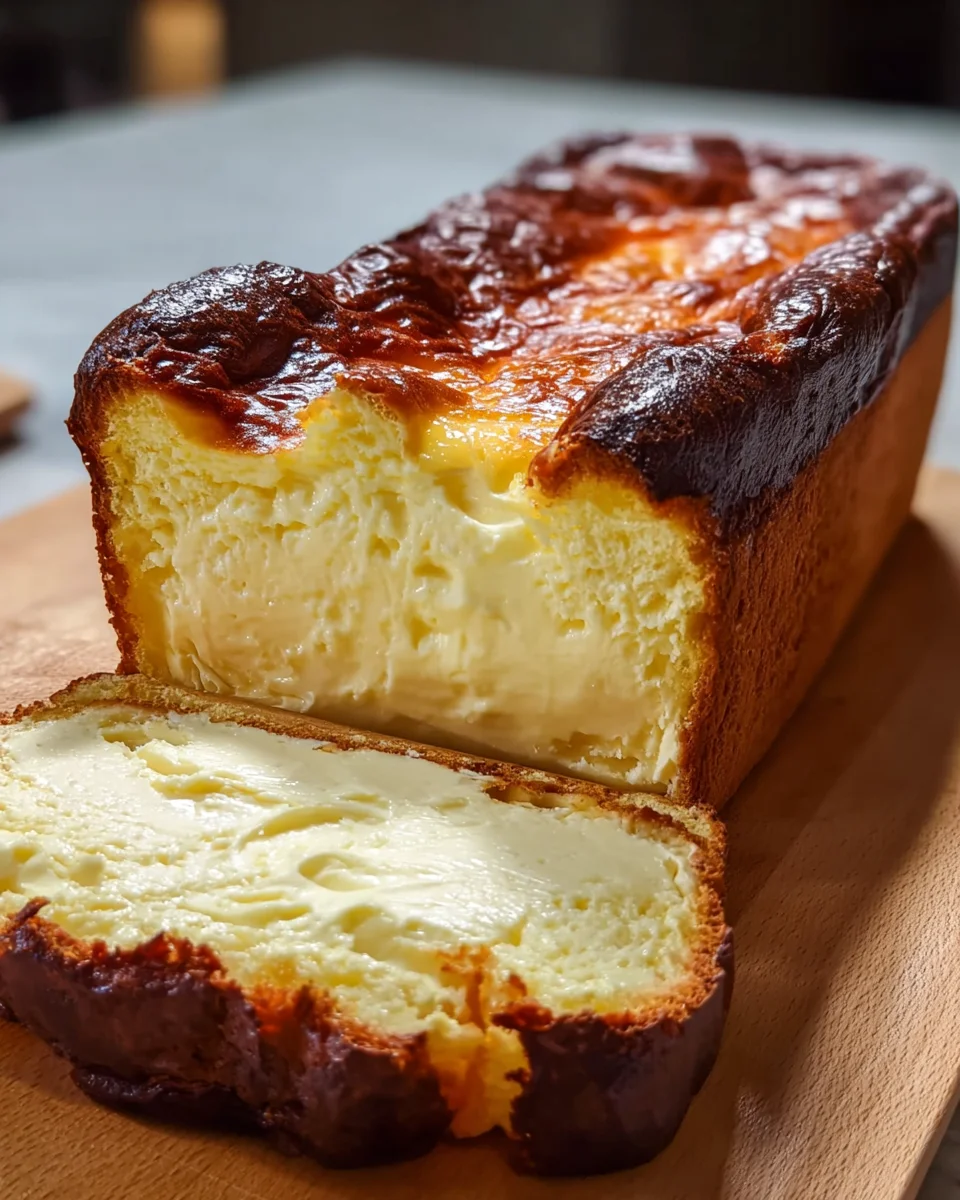
Pour the batter into your prepared loaf pan. Give it a gentle tap on the counter to release any pesky air bubbles trapped inside. Bake your cheesecake for about 40–45 minutes. Watch closely as the top turns a beautiful golden brown while the center retains its jiggle. That’s the sweet spot!
Step 7: Cool and Chill
Once baked, allow the cheesecake to cool completely at room temperature. This step is vital—cutting too early can lead to a gooey mess! After it cools down, cover it and refrigerate for at least 4 hours, ideally overnight. Patience truly pays off in achieving that creamy texture we’re all after!
Tips for Success
- Always use room temperature ingredients for a smoother blend.
- Don’t skip the parchment paper; it ensures easy removal.
- Check your oven’s temperature with a thermometer for accuracy.
- Test the doneness with a gentle shake; the center should jiggle slightly.
- Plan ahead and allow chilling time for the best flavor.
Equipment Needed
- Loaf pan: A standard-sized one works, but a silicone mold is an easy alternative.
- Electric mixer: A hand mixer or even a wooden spoon will do the trick if you prefer a workout!
- Mixing bowls: A large bowl for mixing and a smaller one for sifting flour.
- Parchment paper: Use wax paper if you’re out—it’ll still help with the removal!
Variations on Burnt Basque Cheesecake Loaf
- Chocolate Delight: Add 100g of melted dark chocolate to the batter for a rich, chocolatey twist.
- Citrus Zest: Incorporate a teaspoon of lemon or orange zest for a refreshing, zesty flavor.
- Berry Bliss: Swirl in 1/2 cup of pureed fresh berries like raspberry or strawberry for a fruity kick.
- Nutty Crunch: Fold in 1/2 cup of finely chopped nuts—like almonds or hazelnuts—for added texture.
- Dairy-Free Option: Substitute cream cheese and heavy cream with cashew cream and coconut yogurt for a creamy vegan version.
Serving Suggestions for Burnt Basque Cheesecake Loaf
- Pair a slice with fresh berries for a pop of color and flavor.
- Drizzle with honey or caramel sauce for extra sweetness.
- Serve alongside a dollop of whipped cream for added richness.
- Accompany with a cup of coffee or a bold red wine for a delightful contrast.
- Garnish with mint leaves for a refreshing touch!
FAQs about Burnt Basque Cheesecake Loaf
As you embark on your baking journey with this Burnt Basque Cheesecake Loaf, you might have a few questions. Here are some common queries I often hear, along with helpful answers!
Can I use low-fat cream cheese? Yes, you can, but it may affect the creaminess and richness that makes this cheesecake loaf special. Full-fat cream cheese is recommended for the best texture!
How do I store the cheesecake loaf? Store your Burnt Basque Cheesecake Loaf in an airtight container in the fridge. It stays fresh for up to 5 days—a perfect treat for late-night cravings!
Can I freeze the cheesecake loaf? Absolutely! Wrap individual slices tightly in plastic wrap, then place them in an airtight container. They can be frozen for up to 3 months. Just thaw overnight in the fridge before serving!
Why does the cheesecake jiggle in the center? A slight jiggle is normal. This is what keeps it creamy and velvety. If it’s too firm, it might have overbaked!
Can I add flavors to the batter? Yes! Feel free to experiment with lemon zest, chocolate, or vanilla. Variations can elevate the flavor profile and make it uniquely yours!
Final Thoughts on Burnt Basque Cheesecake Loaf
Baking this Burnt Basque Cheesecake Loaf has been a delightful journey filled with flavor, richness, and a sprinkle of joy. Each slice offers a comforting embrace, a sweet reminder that even amidst our busy lives, we can create something truly special. The golden top and creamy interior are bound to spark smiles around the table. Whether it’s for a quick family treat or a gathered celebration, this loaf is your new secret weapon. So, roll up your sleeves, gather your loved ones, and enjoy the sweet moments that come from sharing this incredible dessert together!
Print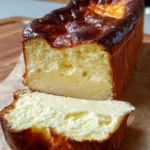
Burnt Basque Cheesecake Loaf
- Total Time: 4 hours and 5 minutes (including chilling time)
- Yield: 8 servings 1x
- Diet: Vegetarian
Description
A rich and creamy burnt Basque cheesecake loaf with a deep golden top and a silky interior, perfect for dessert lovers.
Ingredients
- 340g cream cheese, softened (full-fat)
- 100g granulated sugar
- 2 large eggs, room temperature
- 180ml heavy cream
- 1/2 teaspoon vanilla extract
- 1/8 teaspoon salt
- 1 tablespoon all-purpose flour
Instructions
- Preheat oven to 200°C. Line a loaf pan with parchment paper, ensuring some overhang for easy removal later.
- In a large mixing bowl, beat the cream cheese and sugar until smooth and fluffy, ensuring no lumps remain.
- Incorporate eggs one at a time, mixing thoroughly after each addition to maintain a silky consistency.
- Pour in the heavy cream, vanilla extract, and salt. Beat until fully incorporated and the mixture appears silky and homogeneous.
- Sift the flour into the mixture and fold gently until just combined, being careful not to overmix.
- Pour the batter into the prepared loaf pan. Gently tap the pan on the counter to release any trapped air bubbles.
- Bake for 40–45 minutes, or until the top develops a deep golden color while the center maintains a slight jiggle.
- Allow the cheesecake to cool completely to room temperature, then refrigerate for at least 4 hours (preferably overnight) before slicing and serving.
Notes
- For best results, use high-quality cream cheese.
- Make sure all ingredients are at room temperature before mixing.
- Overmixing can affect the texture of the cheesecake.
- Prep Time: 20 minutes
- Cook Time: 45 minutes
- Category: Dessert
- Method: Baking
- Cuisine: Spanish
Nutrition
- Serving Size: 1 slice
- Calories: 350
- Sugar: 20g
- Sodium: 200mg
- Fat: 26g
- Saturated Fat: 15g
- Unsaturated Fat: 8g
- Trans Fat: 0g
- Carbohydrates: 25g
- Fiber: 0g
- Protein: 5g
- Cholesterol: 90mg


