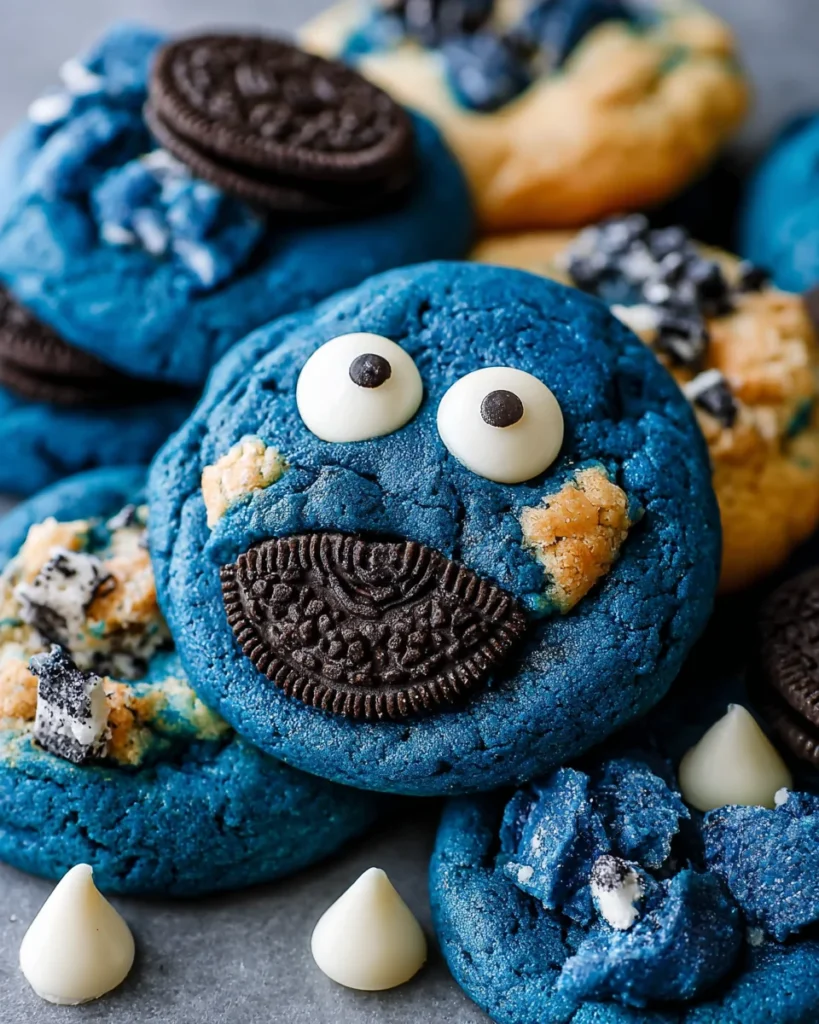
Introduction to Blue Monster Cookie Treats
Hey there, fellow home cooks! If you’re on the hunt for a delightful treat that brings smiles and a dash of fun to your kitchen, you’ve landed in the right spot. Let me introduce you to my all-time favorite, Blue Monster Cookie Treats! These delicious bites aren’t just packed with flavor; they’re also a feast for the eyes with their vibrant blue hue. Perfect for parties, special occasions, or simply to make a weeknight extraordinary, this recipe is easy and guarantees happy bellies around the table. Trust me, these cookies are sure to become a household favorite!
Why You’ll Love This Blue Monster Cookie Treats
What’s not to adore about Blue Monster Cookie Treats? They’re incredibly easy to whip up, even on your busiest days. Plus, the taste is out of this world—with a playful combination of chocolate and cookies, it’s a symphony of flavors! These cookies also provide a great opportunity for family fun, engaging kids in the kitchen. If you’re short on time, this recipe is a delightful shortcut to impress anyone.
Ingredients for Blue Monster Cookie Treats
Gathering the right ingredients is the first step toward cookie greatness! Here’s what you’ll need for these show-stopping Blue Monster Cookie Treats:
- Unsalted butter: A must for that rich and creamy texture. Remember to let it soften at room temperature for best results!
- Brown sugar: This gives your cookies a chewy texture and adds a touch of caramel flavor. It’s like a warm hug in every bite.
- Granulated sugar: This balances sweetness and helps your cookies spread just right. A perfect partnership with brown sugar!
- Large eggs: For binding and moisture. Make sure they’re at room temperature to blend easily.
- Vanilla extract: The magic ingredient that adds warmth and depth. A must in any cookie recipe!
- Royal blue gel food coloring: This is what makes these cookies truly eye-catching. Just a little goes a long way!
- Bread flour: Pot for this for a chewy cookie texture. It contains more protein, giving the cookie the perfect structure.
- Baking powder and baking soda: Essential leavening agents that help your cookies rise and get that lovely soft texture. Don’t forget them!
- Salt: Just a pinch enhances all the sweet flavors, bringing balance to the cookie dough.
- Crushed Oreo cookies: These little chocolate wonders add crunch and flavor. Feel free to sneak a few pieces before they make it into the dough!
- Crushed Chips Ahoy cookies: For additional crunch and a burst of cookie goodness, they add an extra layer of delight.
- White chocolate chips: Creamy and sweet, these little gems provide a lovely contrast to the darker cookie flavors.
- Semi-sweet chocolate chips: For those chocolate lovers out there, this adds just the right amount of richness.
- Whole Oreo cookies: These will be nestled right inside the cookie, creating a delicious surprise with every bite!
- Milk chocolate bars (optional): If you’re extra adventurous, stuffing in these bars will take your cookies over the top!
- Candy eyeballs: The finishing touch that brings these cookies to life! They add a playful and whimsical touch.
All the precise measurements are listed at the bottom of the article if you’re ready to dive into baking. Happy cooking!
How to Make Blue Monster Cookie Treats
Now, let’s roll up our sleeves and get baking! Making Blue Monster Cookie Treats is a fun and thrilling journey, especially with those vibrant colors and delicious flavors. Follow these steps to create your own cookie masterpieces!
Step 1: Creaming the Butter and Sugars
Start by grabbing a large mixing bowl. Add the softened unsalted butter, brown sugar, and granulated sugar. Using an electric mixer, beat them together until you achieve a creamy and smooth consistency. This is important! The fluffier your butter and sugar mixture, the lighter your cookies will be!
Step 2: Adding Eggs and Food Coloring
Next, add in the large eggs, one at a time. Make sure to mix fully after each addition so they blend in perfectly. Then, it’s time for the fun part! Pour in the royal blue gel food coloring. Mix until the dough turns a beautiful, uniform blue color that makes you feel playful. It’s like waving a magic wand in your kitchen.
Step 3: Combining Dry Ingredients
Now, grab another bowl and sift together the bread flour, baking powder, baking soda, and salt. Sifting helps to aerate the flour, ensuring your cookies are light. Gradually add this dry mixture to your buttery concoction. Mix on low speed until everything is just combined—don’t overdo it. We want soft, chewy cookies, not tough ones!
Step 4: Folding in Mix-Ins
Here comes the delicious part! Using a rubber spatula, carefully fold in the crushed Oreo cookies, crushed Chips Ahoy cookies, white chocolate chips, and semi-sweet chocolate chips. Be gentle; we want those delicious bits to stay intact, lending flavor and texture without losing their crunch.
Step 5: Shaping the Cookies
Grab a #30 cookie scoop—this is about two tablespoons worth of dough. Scoop out the dough and form 12 dough balls. Slightly flatten each ball and place either a whole Oreo cookie or a square of a milk chocolate bar right in the center. Cover it with more dough, pinching the edges to seal the surprise inside. Your delicious filling is hidden away now!
Step 6: Chilling the Dough
Once shaped, it’s crucial to chill the dough! Place the cookie dough balls on a baking sheet and pop them into the refrigerator for at least three hours. Chilling firms up the dough, preventing the cookies from spreading too much while they bake. Plus, it makes your treat even tastier!
Step 7: Prepping for Baking
When the dough is chilled and firm, preheat your oven to 350°F. Line your baking sheets with parchment paper—this helps prevent sticking. Space the chilled cookie dough balls apart on the sheets; this gives them room to spread while baking. And trust me, they will spread and grow into the most tempting cookies!
Step 8: Baking the Cookies
Pop those trays into the oven and bake for 15 to 18 minutes. You want the edges to set, while the tops look ever-so-slightly cracked. This is the sweet spot for that perfect chewy texture! Once they’re ready, let the cookies cool on the baking sheet for about 10 minutes. Then, transfer them to a wire rack to cool completely. Enjoy this wait; the aroma is divine!
Tips for Success
- Always use softened butter for easy mixing and a better texture.
- Chill the dough for at least three hours. This prevents spreading and enhances flavor.
- Feel free to swap out mix-ins based on your family’s favorites—get creative!
- Use a kitchen scale for precise measurements if you have one; it can help!
- Don’t skip the parchment paper; it’s the secret to perfect cookie release!
Equipment Needed
- Large mixing bowl: You can also use a stand mixer if you have one for easy mixing.
- Electric mixer: A hand mixer works just fine if you don’t have a stand mixer.
- Rubber spatula: This is great for folding in ingredients, but a wooden spoon works too.
- Cookie scoop: A tablespoon can be a handy alternative for portioning cookie dough.
- Baking sheets: Use any flat, oven-safe sheet; just remember to line them with parchment paper!
Variations

- Nut Allergies: Swap in sunflower seed butter for a nut-free option that still delivers a delicious taste.
- Gluten-Free: Use a 1-to-1 gluten-free baking blend in place of bread flour to make these treats gluten-free.
- Low Sugar: Reduce the granulated and brown sugars by half or try using a sugar substitute to cut calories.
- Vegan Option: Replace eggs with flaxseed meal or chia seeds and use vegan butter for a plant-based twist.
- Flavor Twists: Add a hint of almond or peppermint extract for a delightful twist on the classic vanilla flavor.
Serving Suggestions
- Pairing drinks: Serve these cookies with a glass of cold milk or a warm cup of coffee for a delightful contrast.
- Presentation: Arrange them on a colorful platter to show off their vibrant blue hue; it makes a lovely centerpiece!
- Special occasions: These treats are perfect for birthday parties or family gatherings—everyone will want seconds!
- Snack time: Pack them in lunchboxes for a fun twist that kids will love!
FAQs about Blue Monster Cookie Treats
Got questions about these delightful Blue Monster Cookie Treats? Don’t worry, I’ve got you covered! Here are some answers to common queries that might pop up as you embark on your cookie-baking adventure.
Can I use different food coloring?
Absolutely! If blue isn’t your favorite, feel free to swap it for another color. Just keep in mind that food coloring can impact the final look, so choose a color that excites you!
How should I store the cookies?
To maintain their freshness, store the cookies in an airtight container at room temperature. If you want them to last longer, you can freeze them for up to three months!
Can I make the dough ahead of time?
You bet! You can prepare the cookie dough and chill it for up to a day before baking. Just make sure to cover it well to prevent drying out. It’s a real time-saver for busy weeks!
Are these cookies suitable for children with allergies?
Check the ingredients carefully! While these Blue Monster Cookie Treats are vegetarian, they do contain eggs and wheat. However, you can make allergy-friendly variations by using substitutes, like gluten-free flour or egg replacements.
What’s the best way to serve these cookies?
These cookies shine at parties or gatherings! Pair them with ice cream or a fun dip, and watch your guests’ eyes widen in delight. They’re not just cookies; they’re a playful experience!
Final Thoughts
Creating Blue Monster Cookie Treats is more than just baking; it’s an adventure filled with color, creativity, and a sprinkle of joy! The vibrant blue, combined with the delightful crunch from the cookie bits, makes these treats a hit, not just for kids but for adults too. The smiles around the table as everyone digs in are truly priceless. And let’s not forget the joy of sharing these cookies with family or friends! So, roll up your sleeves, unleash your inner baker, and whip up a batch of happiness. You won’t regret it, I promise!
Print
Blue Monster Cookie Treats
- Total Time: 3 hours and 48 minutes (includes chilling time)
- Yield: 12 large cookies 1x
- Diet: Vegetarian
Description
Delicious and fun Blue Monster Cookie Treats, perfect for parties or special occasions.
Ingredients
- 1 cup unsalted butter, softened
- 1 cup packed brown sugar
- 1/2 cup granulated sugar
- 2 large eggs, room temperature
- 2 teaspoons vanilla extract
- 1 tablespoon royal blue gel food coloring
- 3 cups bread flour
- 1 teaspoon baking powder
- 1/2 teaspoon baking soda
- 1/2 teaspoon salt
- 1 cup crushed Oreo cookies
- 1 cup crushed Chips Ahoy cookies
- 1 cup white chocolate chips
- 1 cup semi-sweet chocolate chips
- 12 whole Oreo cookies (for stuffing)
- 12 squares milk chocolate bars (optional stuffing)
- 24 candy eyeballs
Instructions
- Beat softened butter, brown sugar, granulated sugar, and vanilla extract in a large bowl with an electric mixer until creamy and smooth.
- Add eggs one at a time, incorporating each fully, then mix in royal blue gel food coloring until dough has uniform blue color.
- Sift bread flour, baking powder, baking soda, and salt directly into the wet ingredients and mix on low speed until just combined.
- Using a rubber spatula, fold crushed Oreo cookies, crushed Chips Ahoy cookies, white chocolate chips, and semi-sweet chocolate chips evenly into the dough.
- Using a #30 cookie scoop (about 2 tablespoons), form 12 dough balls. Flatten each slightly, place a whole Oreo cookie or a square of milk chocolate in the center, then cover with more dough and pinch edges to seal tightly.
- Press two candy eyeballs and extra cookie pieces on top of each cookie dough ball. Refrigerate for at least 3 hours to firm the dough.
- Preheat oven to 350°F. Line baking sheets with parchment paper and arrange chilled cookie dough balls spaced apart. Bake for 15 to 18 minutes until edges are set and tops appear slightly cracked.
- Let cookies cool on the baking sheet for 10 minutes before transferring to a wire rack to cool completely.
Notes
- Ensure the butter is softened for better mixing.
- Chilling the dough is crucial for preventing the cookies from spreading too much while baking.
- Feel free to customize the mix-ins as desired.
- Prep Time: 30 minutes
- Cook Time: 15-18 minutes
- Category: Dessert
- Method: Baking
- Cuisine: American
Nutrition
- Serving Size: 1 cookie
- Calories: 300
- Sugar: 35g
- Sodium: 200mg
- Fat: 15g
- Saturated Fat: 8g
- Unsaturated Fat: 5g
- Trans Fat: 0g
- Carbohydrates: 40g
- Fiber: 2g
- Protein: 3g
- Cholesterol: 30mg