Introduction to Halloween Trifle
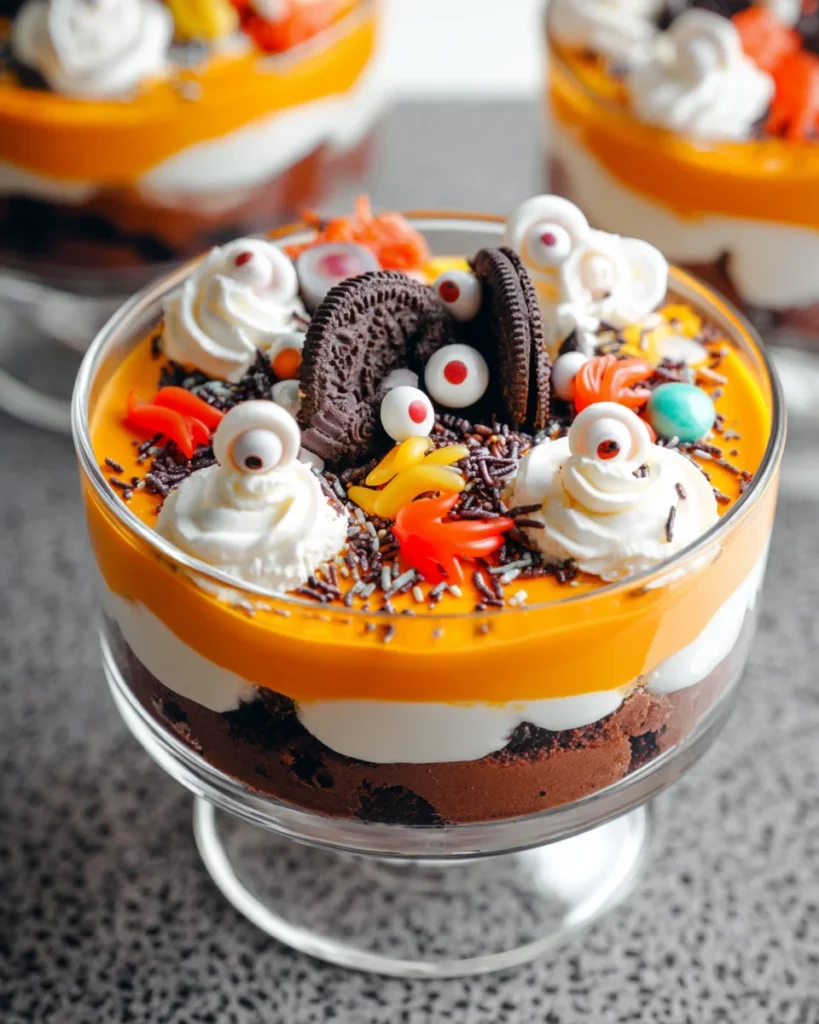
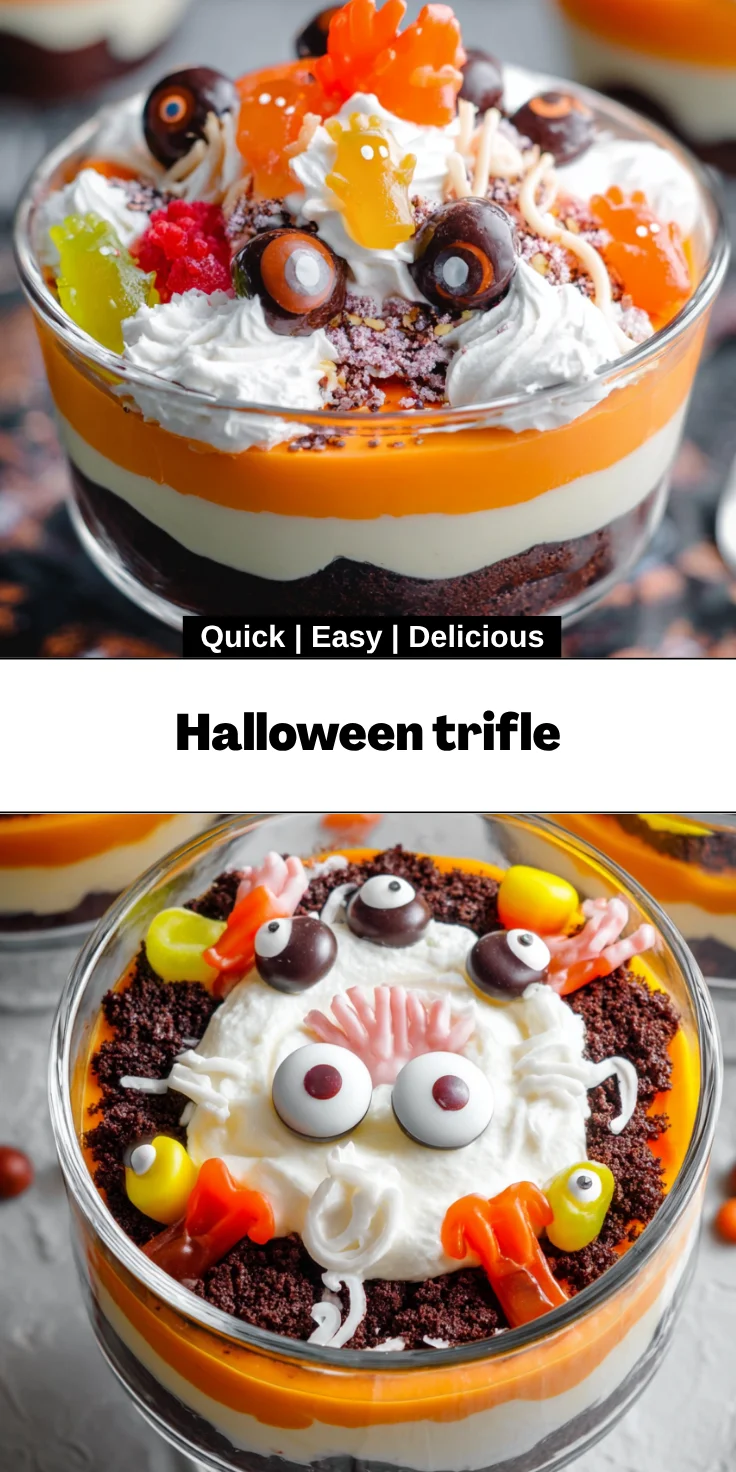
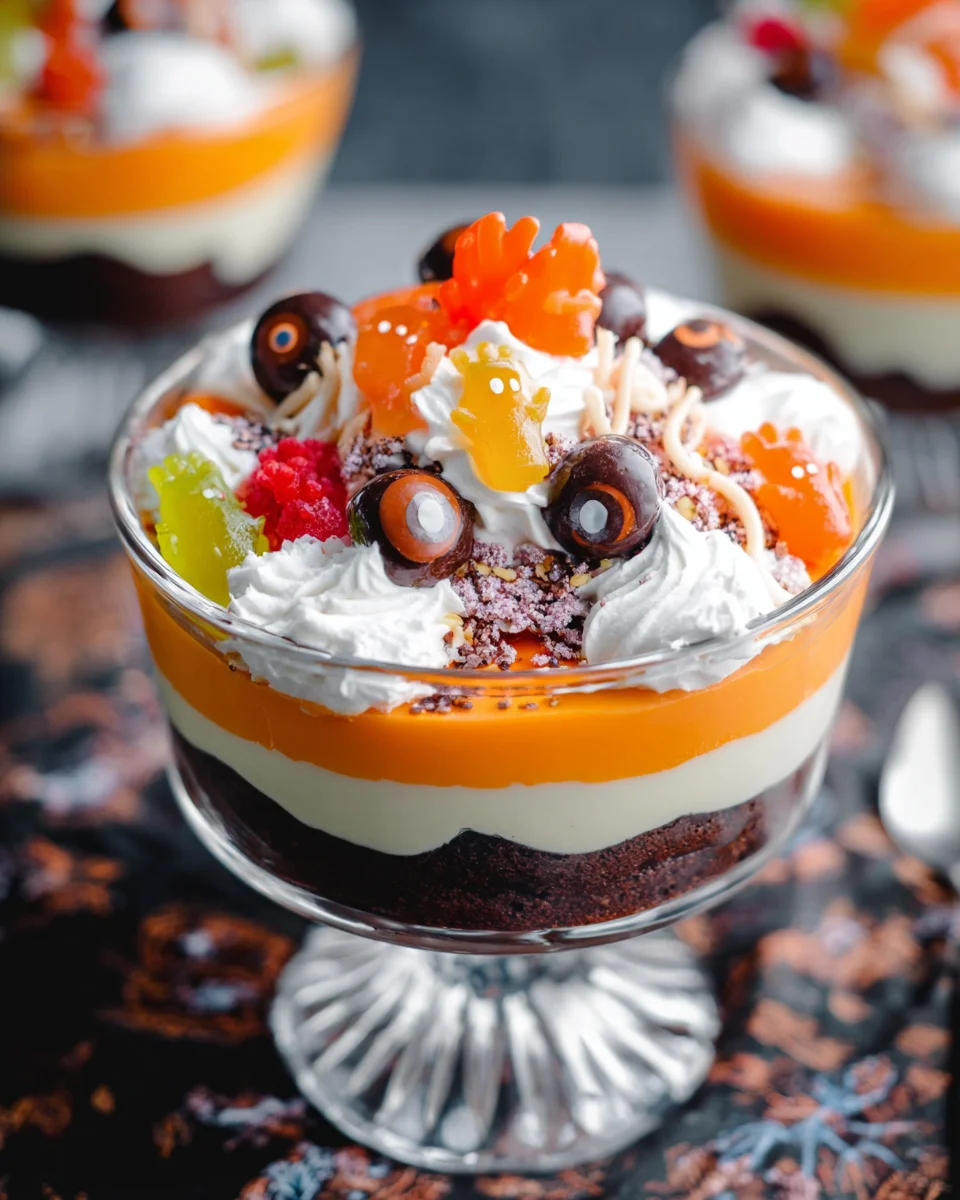
As a busy mom, I know how quickly time can slip away, especially during the Halloween season bustling with costumes and candy preparations. That’s why I can’t wait to share my delightful Halloween trifle! This fun and festive dessert combines layers of decadent chocolate cake and creamy vanilla pudding, all topped with whipped goodness. It’s a perfect treat that will impress your family and friends, without taking up your entire day. You’ll find that this Halloween trifle becomes a showstopper at any gathering, bringing smiles and sweet anticipation to all who indulge!
Why You’ll Love This Halloween Trifle
This Halloween trifle is the ultimate solution for busy moms looking to create a delicious dessert with minimal effort. It’s quick to prepare, taking just 35 minutes from start to finish! Plus, the blend of flavors—from rich chocolate to smooth vanilla—will leave everyone asking for more. And let’s be honest, who doesn’t love a dessert that looks as good as it tastes? This trifle will be the highlight of your Halloween feast!
Ingredients for Halloween Trifle
Let’s dive into the fun part: the ingredients! This Halloween trifle effortlessly combines delightful flavors and festive fun. Here’s what you’ll need:
- Chocolate cake mix: The base of our trifle, rich and delicious. You can use your favorite brand.
- Water: Just a simple liquid to help bring the cake mix together.
- Vegetable oil: This adds moisture to the cake, keeping it soft and tasty.
- Large eggs: Vital for binding the cake and giving it a light texture. I always use room temperature eggs for best results.
- Instant vanilla pudding: This is where the magic happens! Creamy and sweet, it adds a satisfying layer to the trifle.
- Milk: Helps mix with the pudding for that silky-smooth consistency we crave.
- Orange food coloring: Totally optional, but adds a fun spooky twist to the pudding!
- Cool Whip: Light and fluffy, this topping is perfect for a trifle. You can also use homemade whipped cream if you prefer.
- Sprinkles: Tiny bursts of color to make your trifle extra festive!
- Chocolate balls wrapped like eyes: These are fantastic for that creepy, Halloween touch—perfect for little ones!
- Gummy body parts: Think brains and fingers! These fun candies make it all the more festive.
- Any decorations you like: Feel free to unleash your creativity; it’s your masterpiece!
For precise measurements, check the bottom of the article where they’re available for printing. Remember, the joy of cooking comes from making it your own! So let your imagination run wild with these ingredients!
How to Make Halloween Trifle
Ready to bring this spooky creation to life? With just a few steps, you’ll have a stunning Halloween trifle that’s sure to wow your guests. Let’s get started!
Step 1: Prepare the Cake
First, let’s whip up that chocolate cake!
Begin by preheating your oven to 350 degrees F. It’s like warming up an old friend—trust me, this will make a difference!
Grab a small rimmed baking sheet and lightly spray it with cooking spray. This ensures our cake won’t stick. In a large mixing bowl, combine the chocolate cake mix, water, vegetable oil, and eggs. Beat everything together until the mixture is smooth—around two minutes will do the trick.
Next, pour the batter into the prepared baking sheet, spreading it evenly. Bake for about 12 to 15 minutes, or until a toothpick poked in the center comes out clean.
Once baked, allow the cake to cool on a wire rack. Cooling is essential—no one wants a soggy trifle! Let it chill out completely while you work on the next layer.
Step 2: Make the Vanilla Pudding
Now, time for the creamy layer that will tie everything together!
In a medium bowl, whisk together the instant vanilla pudding mix and milk. Keep whisking until it becomes smooth—about two minutes should suffice.
If you’re feeling festive, this is the moment to add a few drops of orange food coloring. It’s an optional step, but it brings a Halloween vibe that everyone loves!
Cover the bowl and place it in the refrigerator for about 10 to 15 minutes. This chilling allows the pudding to set perfectly. Just imagine that velvety goodness ready to be layered in your trifle!
Step 3: Assemble the Trifle
Let’s bring it all together—layers of deliciousness await!
Grab your trifle dish and take out the cooled chocolate cake. Using a sharp knife, carefully cut circles from the cake that will fit inside the bottom of the dish.
Start with a layer of the chocolate cake at the bottom. It’s the foundation of our spooky delight!
Next, pipe or spoon the prepared vanilla pudding over the cake layer. The smoothness is just irresistible!
Then, add a generous layer of Cool Whip. I usually like to pipe it too, just for that extra special touch.
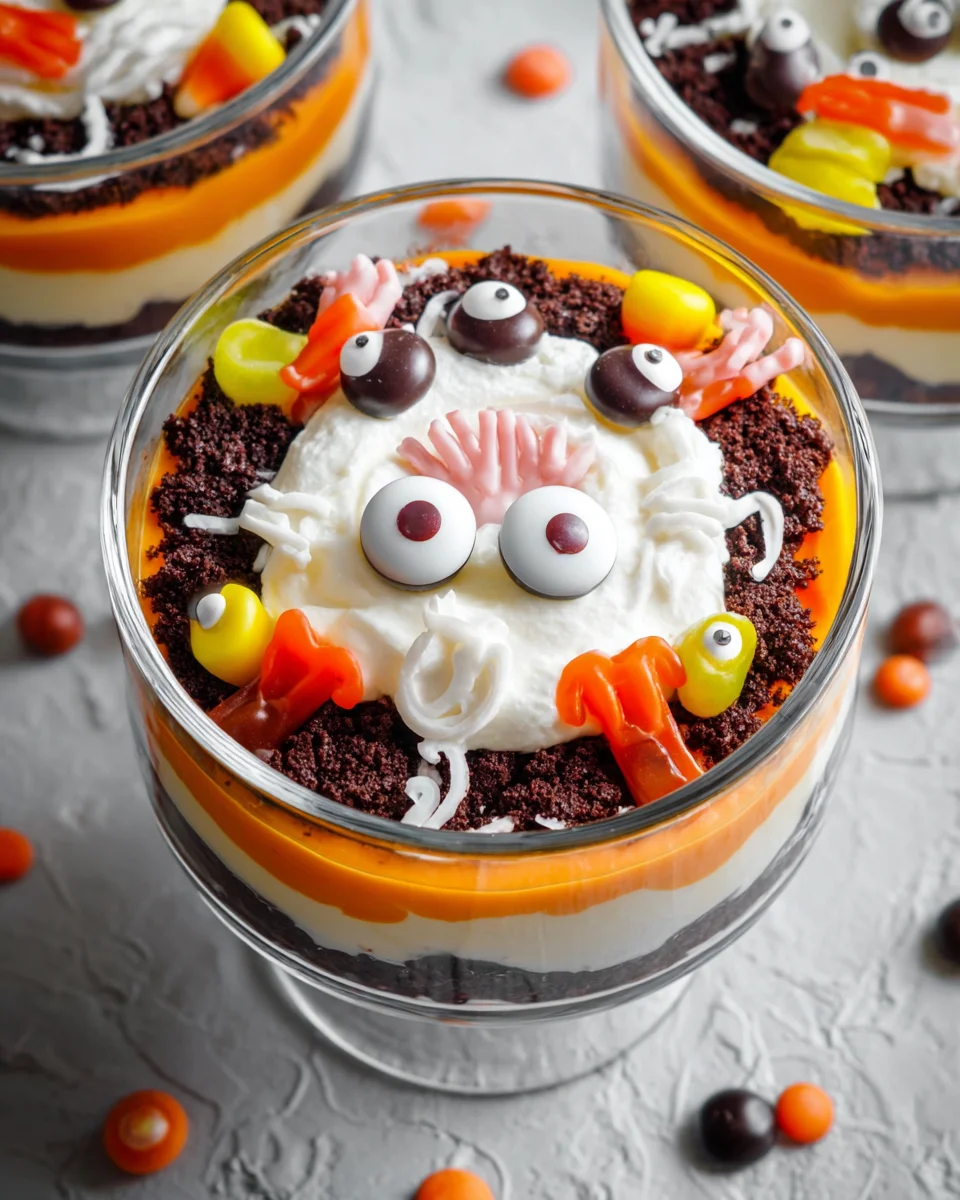
Now, the fun part—decorating! Sprinkle some colorful sprinkles and arrange those spooky gummy body parts and chocolate eyes to create a festive scene. Repeat the layers until your dish is full, finishing with whipped topping.
Cover your trifle with plastic wrap and refrigerate it until you’re ready to serve. If you can wait, I promise it only gets better as the flavors meld together!
Tips for Success
- Make the chocolate cake a day ahead for easier assembly.
- Use room temperature ingredients for the cake and pudding, ensuring fluffy texture.
- Feel free to swap in your favorite cake mix or pudding flavors.
- If you don’t have a trifle dish, any large glass bowl will work beautifully.
- Get the kids involved! Let them add decorations for added fun.
Equipment Needed for Halloween Trifle
- Mixing bowls: A large bowl for the cake and a medium one for the pudding. Any bowl will do!
- Baking sheet: A small rimmed baking sheet works best, but a casserole dish can be a great alternative.
- Trifle dish: Use a clear glass bowl to showcase the layers, but any large bowl will suffice.
- Whisk: A simple whisk for mixing. A fork can work too in a pinch!
- Pastry bags: Ideal for piping, but zip-top bags cut at the corner work perfectly!
Variations of Halloween Trifle
- Funfetti Version: Swap out chocolate cake mix for a funfetti mix and use white frosting instead of Cool Whip for a colorful twist.
- Red Velvet Delight: Use red velvet cake instead of chocolate for a striking contrast with the vanilla pudding.
- Gluten-Free Option: Use a gluten-free chocolate cake mix to make this dessert accessible for everyone.
- Vegan Trifle: Replace the eggs and milk with vegan alternatives, like flaxseed for eggs and almond milk for a dairy-free treat.
- Fruit Layer: Add layers of fresh berries between the cake and pudding for a refreshing burst of flavor and extra nutrition.
Serving Suggestions for Halloween Trifle
- Pair with warm apple cider for a festive fall drink that complements the dessert.
- Serve with spooky-themed cookies for an extra sweet touch at your gathering.
- Display the trifle on a colorful Halloween tablecloth to make it shine.
- Top each serving with a few extra gummy candies for a fun surprise!
FAQs about Halloween Trifle
Let’s address some of the most common questions I hear about making this charming Halloween trifle. I want you to feel confident and excited about creating this dessert!
Can I make Halloween trifle ahead of time?
Absolutely! In fact, I recommend it. Making your trifle a day in advance allows the flavors to meld together beautifully. Just be sure to cover it well before refrigerating so it stays fresh!
What can I use instead of Cool Whip?
If you’re not a fan of Cool Whip, feel free to whip up some homemade whipped cream. Just beat heavy cream with sugar until you reach soft peaks. It adds a lovely touch to your trifle!
Can I customize the decorations?
Of course! The beauty of this Halloween trifle is how versatile it is! Use whatever spooky treats you like—candy corn, chocolate-covered pretzels, or even edible glitter. Get creative!
Is it possible to make this trifle gluten-free?
Certainly! Opt for a gluten-free chocolate cake mix to make this trifle inclusive for everyone. Just check the pudding mix as well; there are gluten-free options available.
What if my kids won’t eat the decorations?
No worries! You can always set aside a portion of the trifle without the spooky treats for those picky eaters. They can enjoy the delicious layers without any frights!
Final Thoughts
As I wrap up my Halloween trifle adventure, I can’t help but smile thinking about the joy it brings to my family. This easy, layered dessert captures the spirit of Halloween while offering a delicious treat that everyone can enjoy. It’s a memory-maker, a conversation starter, and a lovely addition to any gathering. Whether you choose to decorate it with spooky candies or leave it simple, the delightful blend of chocolate, vanilla, and whipped cream is sure to enchant young and old alike. So, gather your loved ones and bring home the fun with this charming Halloween trifle!
Print
Halloween trifle
- Total Time: 35 minutes
- Yield: Serves 8
- Diet: Vegetarian
Description
A fun and festive Halloween trifle that layers chocolate cake, creamy vanilla pudding, and whipped topping, decorated with spooky treats.
Ingredients
- 1 box chocolate cake mix
- 1 cup water
- ½ cup vegetable oil
- 3 large eggs (room temperature)
- 1 small box instant vanilla pudding
- 2 cups milk
- Orange food coloring (optional)
- 8 oz container Cool Whip
- Sprinkles
- Chocolate balls wrapped like eyes
- Gummy body parts like brains, teeth, fingers, etc.
- Any decorations you like
Instructions
- Move the oven rack to the middle position and preheat the oven to 350 degrees F.
- Spray a small rimmed baking sheet with cooking spray.
- In a large bowl, beat together cake mix, water, oil, and eggs until smooth.
- Spread the batter evenly into the baking sheet.
- Bake for 12-15 minutes or until a toothpick inserted in the center comes out clean.
- Remove the cake from the oven and cool on a cooling rack until completely cooled.
- Meanwhile, in a medium bowl, whisk together pudding mix and milk until smooth.
- Add several drops of orange food coloring and whisk until well combined.
- Place pudding in the refrigerator for 10-15 minutes or until completely set.
- Remove pudding and whipped topping from the refrigerator.
- Fit two pastry bags with large round tips.
- Add pudding in one bag, and in the other, add whipping topping.
- Using the rim of your trifle dish as a pattern, lightly press it into the cake.
- Remove and then use a sharp knife to cut out the circle. You may need to cut it a little smaller so it fits into the trifle dish easily.
- Add cake to the trifle dish.
- Then pipe in the pudding.
- Next, add Cool Whip on top of the pudding.
- Decorate with sprinkles and candy, if desired.
- Serve immediately or store in the refrigerator up to 1 day before serving.
Notes
- This dessert can be made a day in advance for convenience.
- Feel free to customize decorations to fit your Halloween theme.
- Ensure that all ingredients are at room temperature for best results.
- Prep Time: 20 minutes
- Cook Time: 15 minutes
- Category: Dessert
- Method: Baking and Assembling
- Cuisine: American
Nutrition
- Serving Size: 1 piece
- Calories: 250
- Sugar: 15g
- Sodium: 200mg
- Fat: 10g
- Saturated Fat: 3g
- Unsaturated Fat: 7g
- Trans Fat: 0g
- Carbohydrates: 36g
- Fiber: 1g
- Protein: 3g
- Cholesterol: 50mg