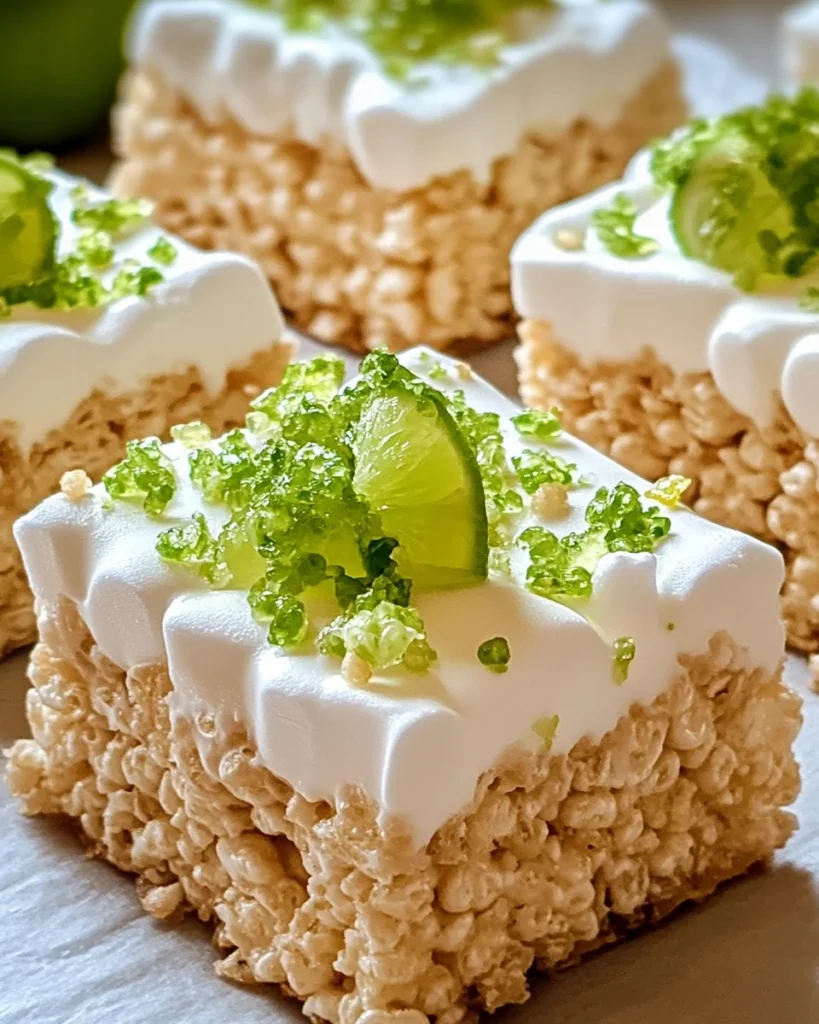
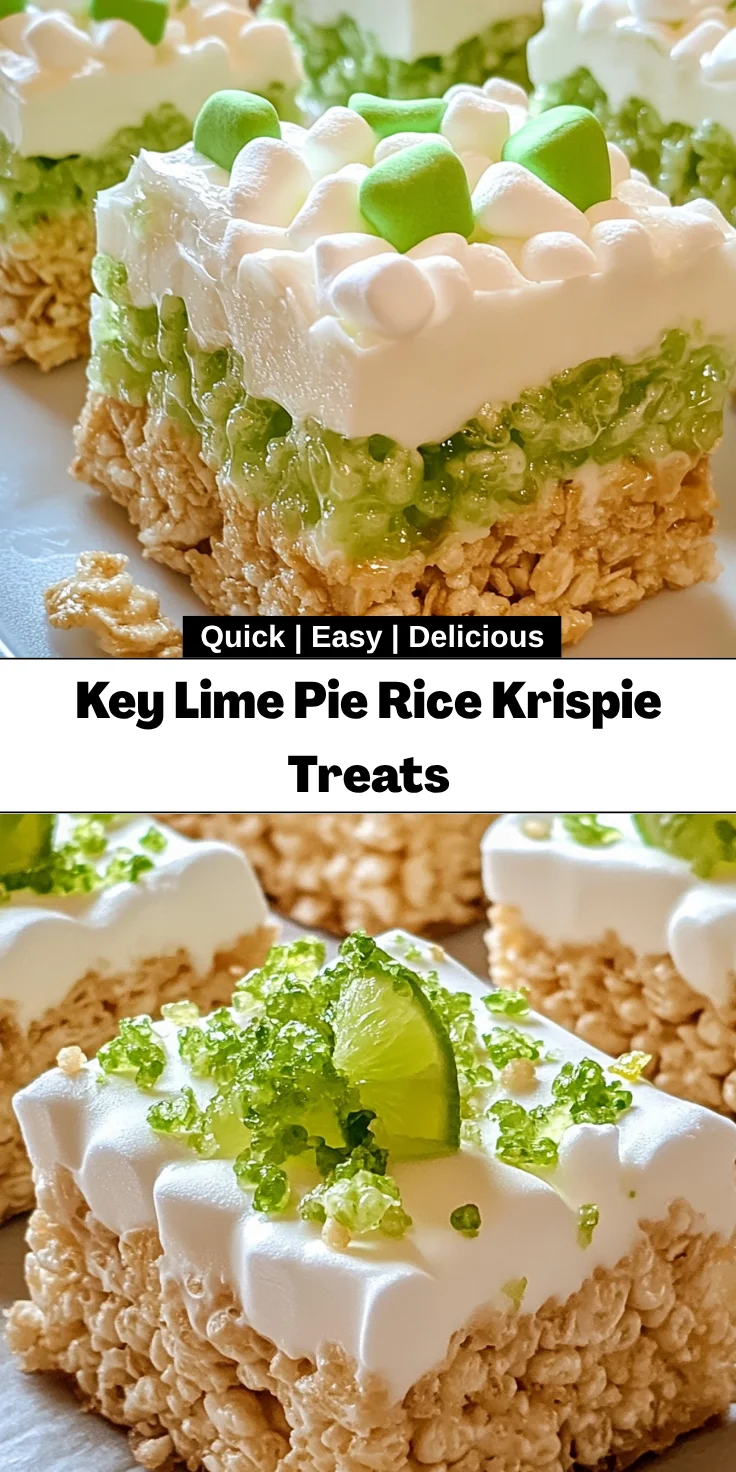
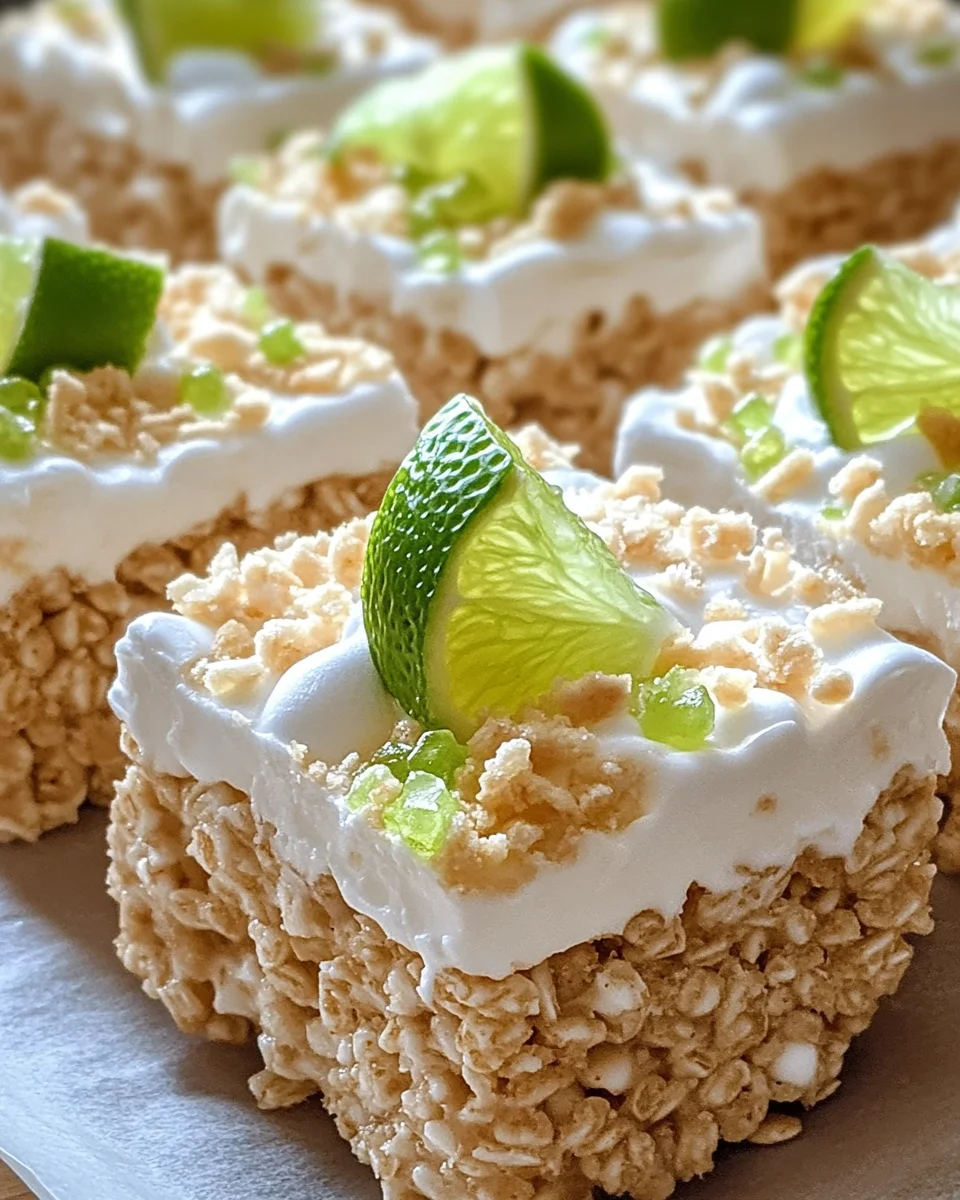
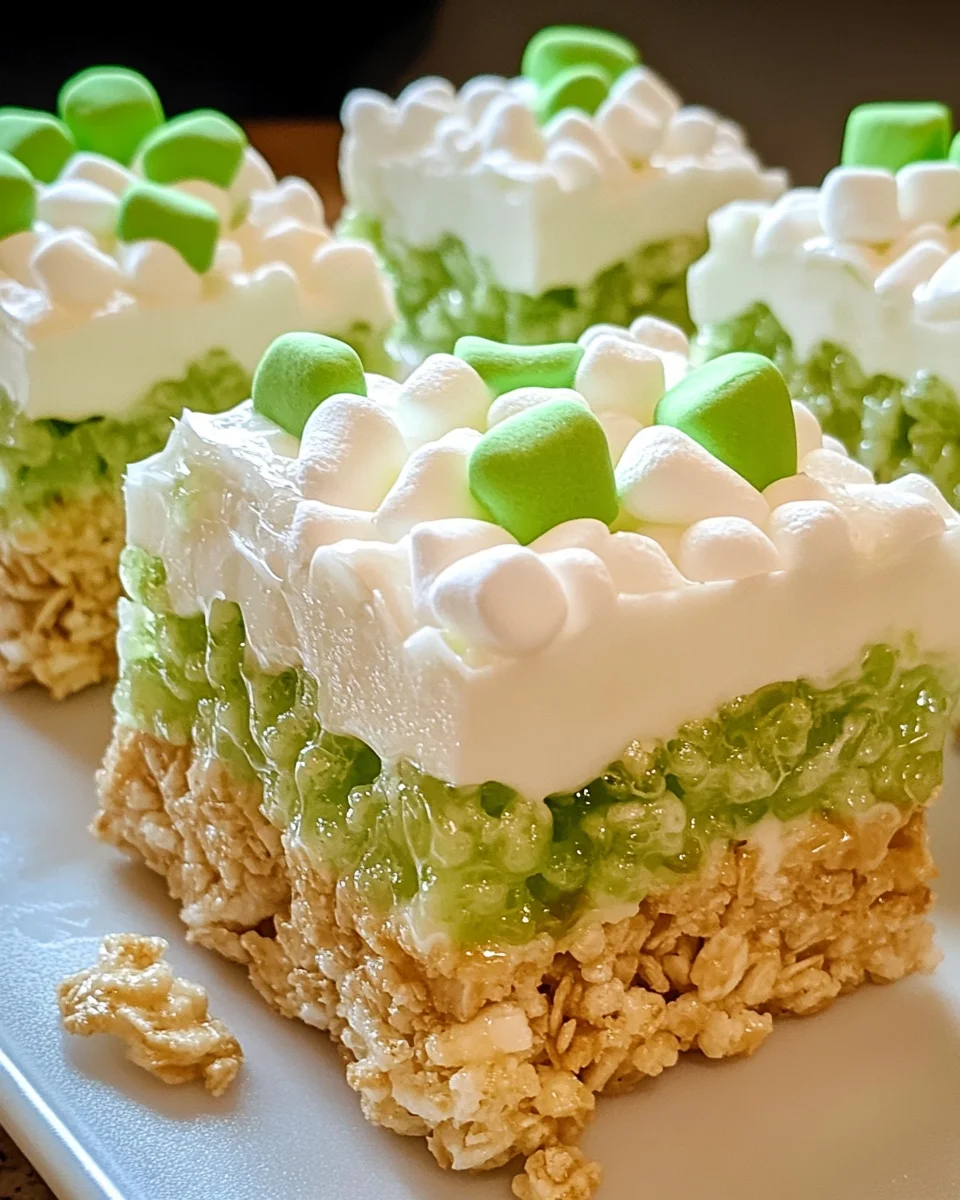
Introduction to Key Lime Pie Rice Krispie Treats
Hey there, busy moms and professionals! If you’re like me, juggling work, family, and everything in between, you’ll love this recipe for Key Lime Pie Rice Krispie Treats. It’s a delightful twist on a classic dessert, marrying the refreshing zest of key lime pie with the crunchy goodness of Rice Krispies. Think of it as a quick solution for those hectic days when you want to whip up something special without spending hours in the kitchen. This treat is sure to impress your loved ones while being effortless to make!
Why You’ll Love This Key Lime Pie Rice Krispie Treats
These Key Lime Pie Rice Krispie Treats are a game-changer for your dessert lineup. First, they come together in under 30 minutes, making them the perfect quick fix. Plus, the bright, tangy flavor of key lime pairs beautifully with the sweet marshmallows and crunchy Rice Krispies. It’s like a delicious vacation in every bite! Trust me; your family will be clamoring for seconds, and you’ll be the star of dessert time!
Ingredients for Key Lime Pie Rice Krispie Treats
Gathering your ingredients is half the fun! These Key Lime Pie Rice Krispie Treats come together with a few staple items that you might already have in your pantry. Here’s what you’ll need:
- Rice Krispies cereal: This classic cereal gives the treats their signature crunch. Any brand will do, but the original Rice Krispies have that perfect texture.
- Mini marshmallows: They provide that delightful gooeyness. Can’t find mini ones? Regular marshmallows cut into smaller pieces work too!
- Unsalted butter: It adds richness and helps melt the marshmallows. Unsalted is preferred to control the overall saltiness of the treat.
- Key lime juice: Fresh or bottled, this is the star of the show! It imparts that iconic tangy flavor. If you can’t find key limes, regular lime juice makes a great substitute.
- Key lime zest: Adds another layer of bright flavor. If you’re short on fresh limes, just skip it, but I highly recommend it for that extra zing.
- Graham cracker crumbs: These bring the classic pie crust flavor. Crush some graham crackers yourself or buy them ready-made for convenience.
- White chocolate chips: For a sweet drizzle on top, white chocolate complements the key lime wonderfully. Dark or milk chocolate wouldn’t hurt either if that’s what you have.
- Coconut oil: Just a bit helps the chocolate drizzle to be nice and smooth. If you’re out, you can skip this step, but it really helps the consistency!
- Optional Add-ins: Feel free to jazz it up! Coconut flakes add a tropical twist, crushed nuts bring crunch, and a few drops of green food coloring can elevate the visual appeal.
Curious about the exact quantities? Not to worry! They’re at the bottom of the article and ready for printing when you’re set to bake!
How to Make Key Lime Pie Rice Krispie Treats
Now, let’s dive into the fun part—making these delicious Key Lime Pie Rice Krispie Treats! The process is straightforward and rewarding. Follow my steps, and soon, you’ll be enjoying a sweet treat that tastes like sunshine!
Step 1: Melt Butter and Marshmallows
To start, grab a large saucepan and melt the unsalted butter over low heat. Keep an eye on it, so it doesn’t brown. Once the butter is melted, add the mini marshmallows. Stir the mixture continuously until the marshmallows become smooth and gooey. The buttery marshmallow mix forms the glue for our treats—just heavenly!
Step 2: Add Key Lime Flavor
Here comes the fun! Stir in the key lime juice and zest, mixing well. This step truly makes your Key Lime Pie Rice Krispie Treats shine with flavor! The tangy lime adds that refreshing zest we crave. If you’re feeling adventurous, consider adding a few drops of green food coloring for that pop of color!
Step 3: Combine with Rice Krispies
In a large mixing bowl, pour the crispy Rice Krispies cereal. Gently fold in the melted marshmallow mixture, making sure every piece is coated. Use a silicone spatula or your hands (be careful, it might be hot!) to mix well. This is where the magic happens, transforming ordinary cereal into a key lime delight!
Step 4: Ready the Mixture
Once everything is nicely combined, take a parchment-lined baking dish—this helps with easy removal later. Spread the mixture evenly into the dish. Press it down gently with your hands or a spatula; just don’t over-pack it. We want these treats to stay light and airy!
Step 5: Add Graham Cracker Crumbs
Next, sprinkle a generous layer of graham cracker crumbs on top of your rice Krispie mixture. This gives the impression of that famous pie crust and adds a delightful crunch. Feel free to get creative—layer some coconut flakes or chopped nuts here if you like!
Step 6: Prepare White Chocolate Drizzle
To finish off our masterpiece, prepare a drizzle of white chocolate. Melt the white chocolate chips with a bit of coconut oil in the microwave, stirring every 30 seconds until smooth. Once melted, grab a spoon and drizzle the chocolate generously over the top. Pure bliss!
Step 7: Chill and Slice Treats
Finally, pop the dish in the refrigerator for about 30 minutes. This will help the treats set perfectly. After they chill, slice them into squares and serve. These Key Lime Pie Rice Krispie Treats are great for any occasion, or just because you deserve a sweet reward!
Tips for Success
- Use fresh key limes if possible; the flavor is unbeatable.
- Be gentle when mixing the Rice Krispies; over-mixing can lead to tough treats.
- For a clean cut, use a sharp knife warmed under hot water when slicing.
- Store the treats in an airtight container to keep them fresh for longer.
- Feel free to experiment with flavors; adding a splash of coconut extract works wonders!
Equipment Needed
- Large saucepan: Any heavy-bottomed pot will do, but a non-stick pan is ideal for easy cleanup.
- Mixing bowl: A large mixing bowl ensures you have space to combine everything without spills.
- Spatula: A silicone or rubber spatula helps fold in the ingredients smoothly.
- Parchment paper: Use it to line your baking dish for effortless removal.
- Microwave-safe bowl: Essential for melting the chocolate; glass works great!
Variations of Key Lime Pie Rice Krispie Treats
- Coconut Delight: Add ½ cup of coconut flakes for a tropical twist that enhances the key lime flavor.
- Nuts about Key Lime: Include ¼ cup of crushed nuts, like pecans or macadamia nuts, for that extra crunch and nutty flavor.
- Chocolate Lovers: Instead of white chocolate, try dark chocolate chips for a richer drizzle that pairs wonderfully with the tangy lime.
- Build Your Own: Personalize your treats with favorite extras like dried fruit, M&Ms, or even a sprinkle of cinnamon for warmth.
- Gluten-Free Option: Use gluten-free crispy rice cereal and ensure that your graham cracker crumbs are also gluten-free!
Serving Suggestions for Key Lime Pie Rice Krispie Treats
- Pair with a refreshing glass of iced tea or lemonade to enhance the citrus flavor.
- Serve alongside fresh fruit like berries or pineapple for a vibrant, colorful presentation.
- Plating on a fun, colorful platter adds a festive touch to any gathering.
- Top with a dollop of whipped cream or a drizzle of lime sauce for an extra treat!
- Consider garnishing with a sprinkle of key lime zest for an eye-catching finish.
FAQs about Key Lime Pie Rice Krispie Treats
Can I make these Key Lime Pie Rice Krispie Treats ahead of time?
Absolutely! These treats can be made a day or two in advance. Just store them in an airtight container in the fridge to keep them fresh. They’ll still taste amazing when you serve them!
What if I can’t find key limes?
No worries! Regular limes do the trick beautifully. While the flavor might be slightly different, it will still give you that zesty kick. Just remember to use fresh juice for the best results!
How do I store leftovers?
After your gathering, you can store leftover Key Lime Pie Rice Krispie Treats in an airtight container. They can be kept at room temperature for a couple of days or in the fridge for a week. Just don’t let them sit too long—they’re too delicious for that!
Can I change the consistency of the treats?
If you prefer softer treats, try adding a little more marshmallow mixture. Conversely, if you want them firmer, you can reduce the marshmallows slightly. Adjustments give you control over the treat’s texture!
What can I use instead of white chocolate?
If white chocolate isn’t your favorite, try drizzling dark or milk chocolate on top! Each type brings a different flavor to the treats, creating a delightful twist. Your taste buds will thank you!
Final Thoughts on Key Lime Pie Rice Krispie Treats
Making Key Lime Pie Rice Krispie Treats isn’t just about whipping up a dessert; it’s about sharing joy and creating memories with those you love. This delightful recipe combines nostalgia and innovation, resulting in a treat that reflects sunny days and happy gatherings. Each bite bursts with refreshing flavors, bringing smiles all around the table. Plus, it’s a quick and easy recipe that fits seamlessly into our busy lives. So whether you’re celebrating a special occasion or just treating yourself, these treats will surely brighten your day and satisfy your sweet cravings!
Print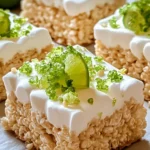
Key Lime Pie Rice Krispie Treats
- Total Time: 25 minutes plus chilling time
- Yield: 24 squares 1x
- Diet: Vegetarian
Description
Delicious and refreshing Key Lime Pie Rice Krispie Treats that combine the classic flavors of key lime pie with the crunchy texture of Rice Krispies.
Ingredients
- 5 cups Rice Krispies cereal
- 10 cups mini marshmallows
- 5 tablespoons unsalted butter
- 1/2 cup key lime juice fresh or bottled
- 2 tablespoons key lime zest
- 1 cup graham cracker crumbs
- 1 cup white chocolate chips
- 1/2 teaspoon coconut oil for smooth chocolate drizzle
- Optional Add-ins: ½ cup coconut flakes, ¼ cup crushed nuts, A few drops green food coloring
Instructions
- In a large saucepan, melt the butter over low heat. Add marshmallows and stir continuously until smooth.
- Stir in key lime juice and lime zest.
- Pour the melted marshmallow mixture over the Rice Krispies cereal in a large bowl. Fold gently until fully coated.
- Spread the mixture evenly into a parchment-lined baking dish. Press gently without over-packing.
- Sprinkle graham cracker crumbs on top.
- Melt white chocolate chips with coconut oil, drizzle over the top, and refrigerate for 30 minutes.
- Slice into squares and enjoy!
Notes
- For added flavor, consider including coconut flakes or crushed nuts as optional toppings.
- Adjust the green food coloring to achieve the desired shade if using.
- Store leftover treats in an airtight container for freshness.
- Prep Time: 15 minutes
- Cook Time: 10 minutes
- Category: Dessert
- Method: No-Bake
- Cuisine: American
Nutrition
- Serving Size: 1 square
- Calories: 180
- Sugar: 15g
- Sodium: 60mg
- Fat: 7g
- Saturated Fat: 4g
- Unsaturated Fat: 0g
- Trans Fat: 0g
- Carbohydrates: 27g
- Fiber: 0g
- Protein: 1g
- Cholesterol: 15mg